Swap Space / Swap File extending in the RHEL Servers
Swap space in Linux is used when the amount of physical memory (RAM) is full. If the system needs more memory resources and the RAM is full, inactive pages in memory are moved to the swap space. While swap space can help machines with a small amount of RAM, it should not be considered a replacement for more RAM. Swap space is located on hard drives, which have a slower access time than physical memory. Swap Space / Swap File extending in the RHEL Servers
By Default, the Linux machines will have a swap space created automatically during the OS installation. We can extend the swap space using 2 methods
- Use a Hard Drive Partition for Additional Swap Space
- Use a File for Additional Swap Space
Method 1: Use a Hard Drive Partition for Additional Swap Space
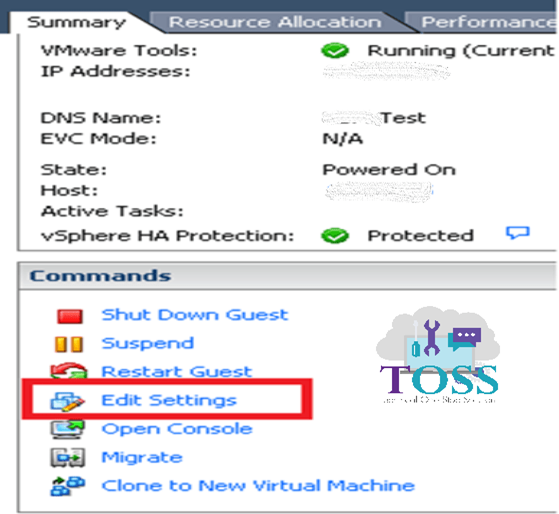
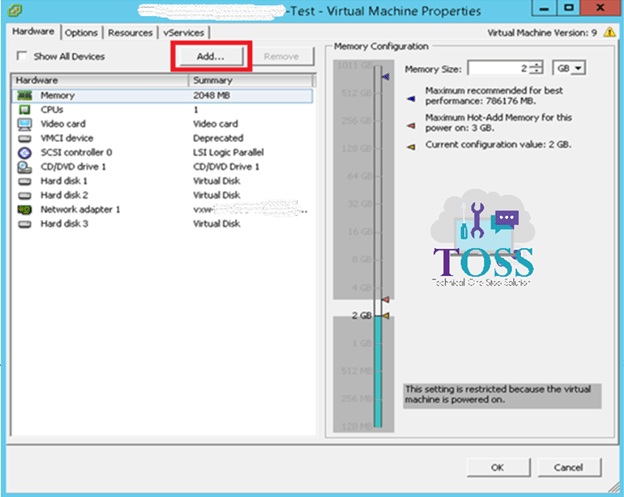
Step 1: Adding the Disk from the vSphere Client – Select the VM and click Edit Settings
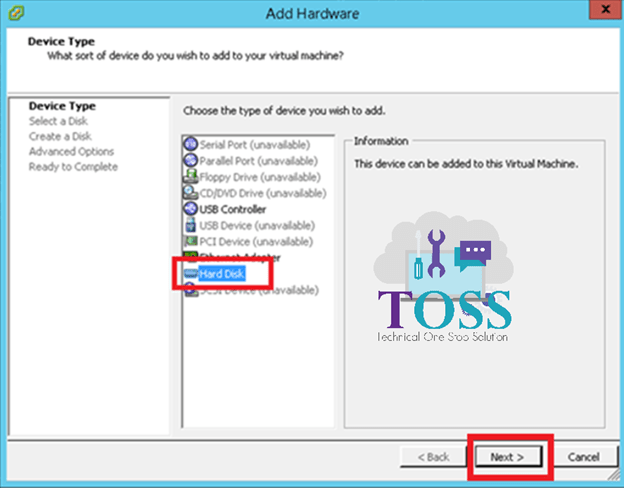
Step 2: Click Add – Select Hard Disk
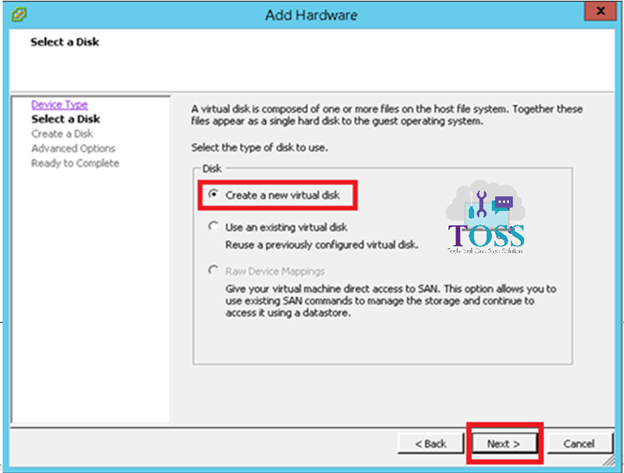
Step 3: Click – Create a new Virtual Disk
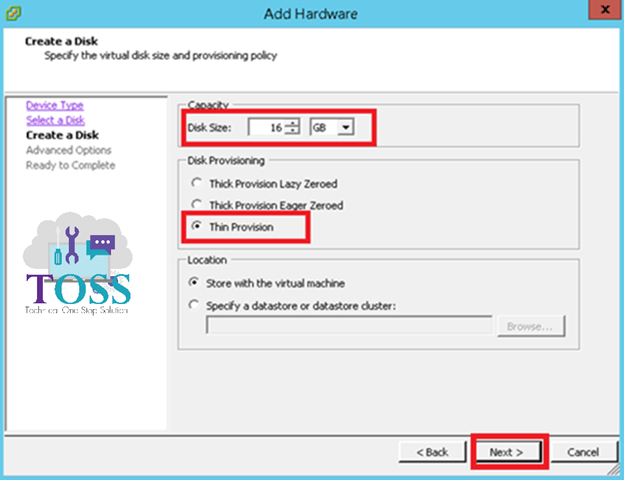
Step 4: Select the Disk Size based on your requirement and Thin provision
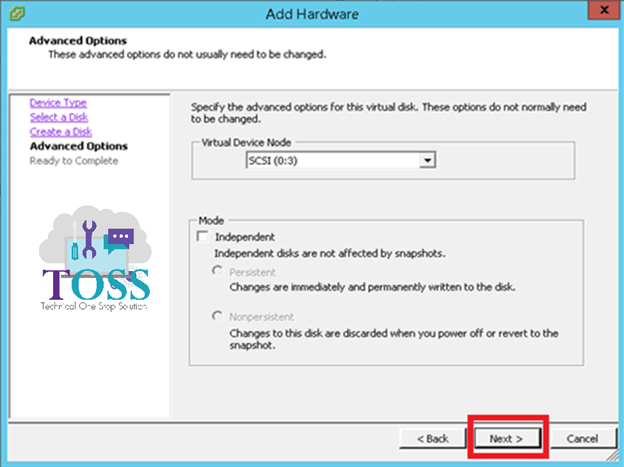
Step 5: Click Next and Click Finish

Step 6: Scan the new drives using the following commands
# echo “- – -” > /sys/class/scsi_host/host0/scan
# echo “- – -” > /sys/class/scsi_host/host1/scan
# echo “- – -” > /sys/class/scsi_host/host2/scan
Note: sometimes you need to reboot the VM for the new disk to be visible in linux
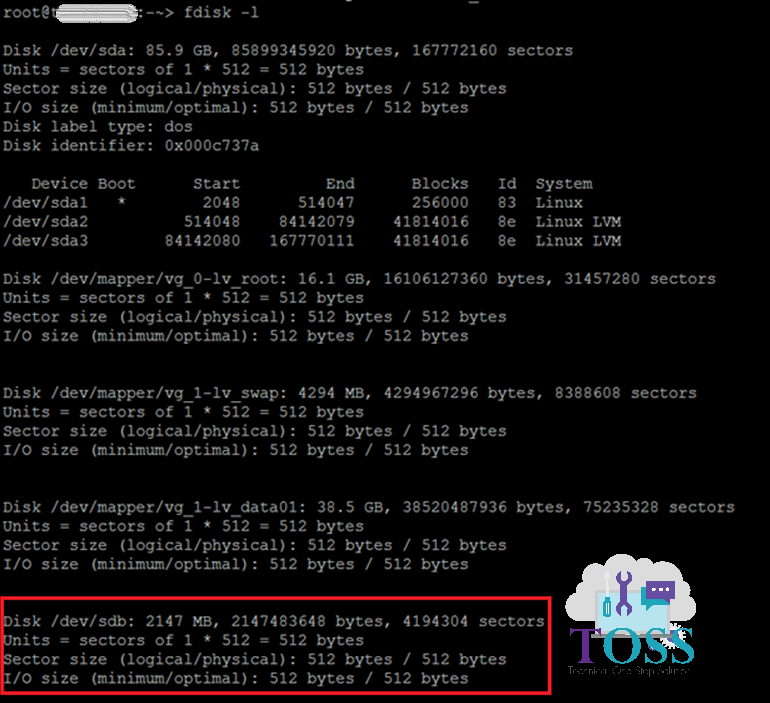
Step 7: Check the fdisk whether Disk is added: #fdisk -l
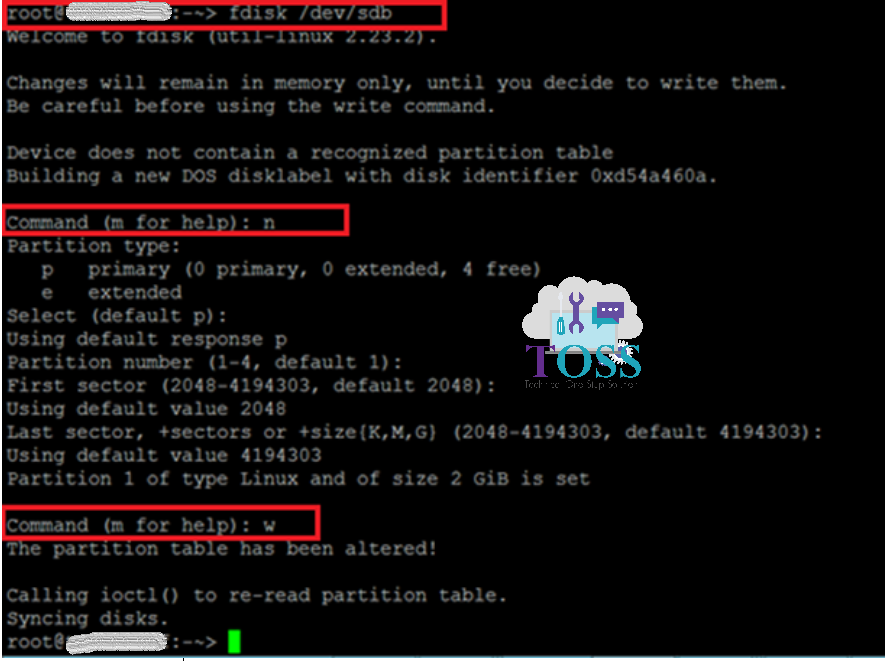
Step 8: Create the Partition: #fdisk /dev/sdb
Step 9: Check the fdisk –l to check whether a partition is created

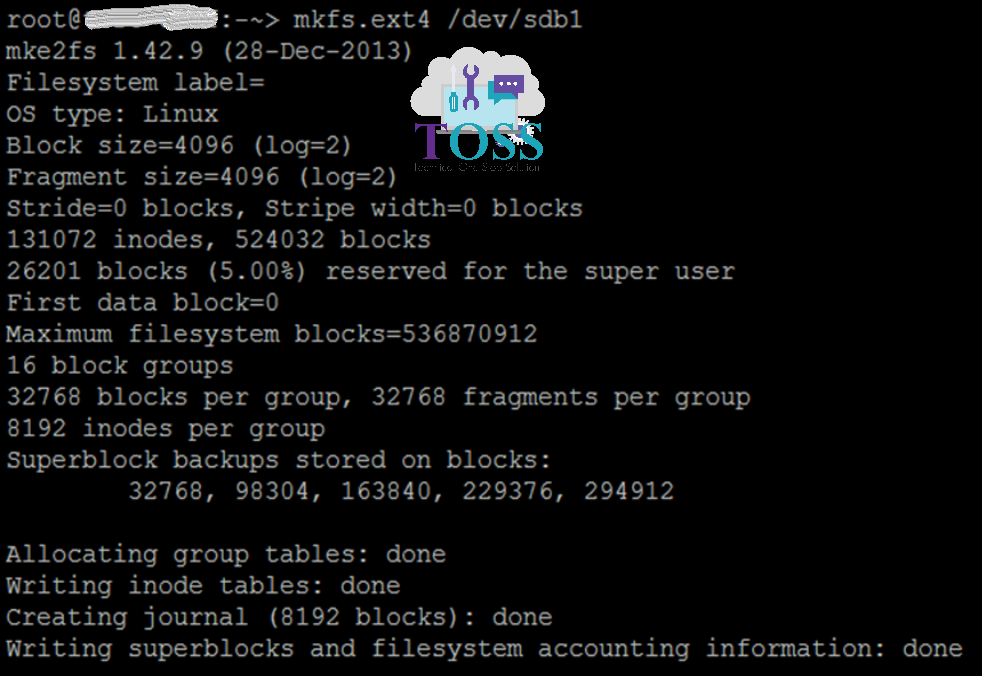
Step 10: Format the Partition to ext4 FileSystem : #mkfs.ext4 /dev/sdb1
Step 11: Create a physical volume: #pvcreate /dev/sdb1

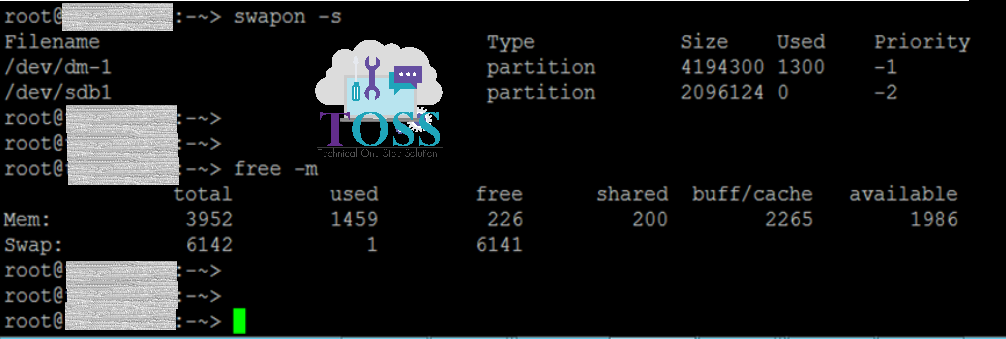
Step 12: Check the current swap space using the command ‘free -m’. We could see current swap is 4GB and we have added 2GB of hard disk , so the final swap space should be 6GB

Step 13: Execute command to make the partition as swap ‘# mkswap /dev/sdb1’

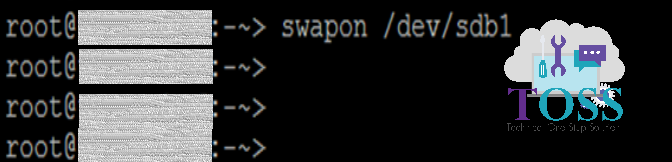
Step 14: Execute Command to enable swap on the created partition ‘# swapon /dev/sdc1’
Step 15: edit the FSTAB and provide the partition details, so that the swap is initialized after every reboot of the VM

Step 16: Verify the swap location and the current swap size
# swapon -s
# free -m
Method 2: Use the file for additional swap space
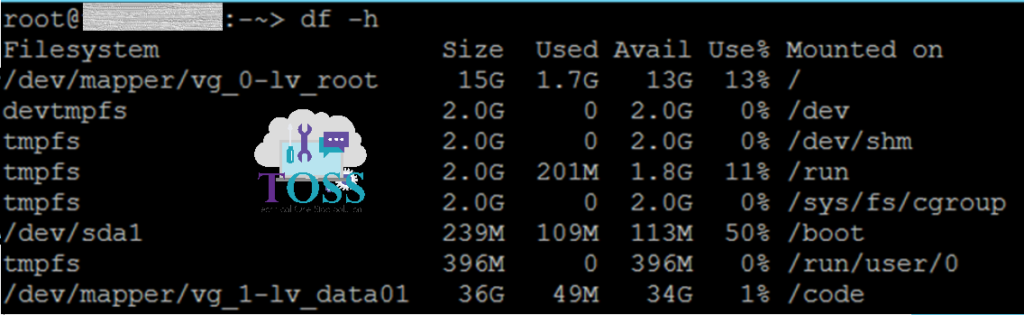
Step 1: I could see the /code has space to create file of 1 GB to extend swap from 4GB to 5GB
Step 2: ‘Free -m’ commands show there is 4GB of swap in this machine

Step 3: Use the command – dd if=/dev/zero of=/code/<myswapfile> bs=1M count=1000
This command will create a 1GB file in the /code partition

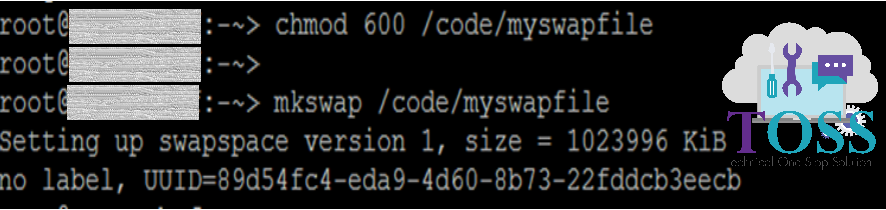
Step 4: Change the ownership of the file for the root access only and execute the ‘mkswap’ to make the file(swapfile in /code) as a swap space
Step 5: Enable the swap for the create 1GB file using the following command

Step 6: Edit the FSTAB and add the file details, so that every time the machine is rebooted – it will initialize the file as a swap space

Step 7: Execute ‘swapon -s’ to verify the swap location details
Note: we could see /code/myswapfile is of Type – File

Step 8: Execute the command ‘free -m’ to verify whether the swap is extended from 4GB to 5GB

We hope this 2 methods of Swap Space / Swap File extending in the RHEL Servers is working fine on your machine also.
And also if you required any technology you want to learn, let us know below we will publish them in our site http://tossolution.com/
Like our page in Facebook and follow us for New technical information.