Installing Windows Server 2019 on the Cisco UCS Blade Server
A Cisco UCS(Unified Computing System) is a Datacenter server computer product line composed of computer hardware virtualization support, switching fabric, and management software. In this blog we are doing Installing Windows Server 2019 on the Cisco UCS Blade Server
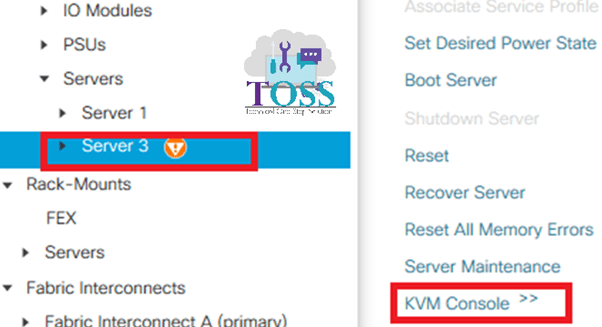
Login to the UCS Manager – Select the Server to install the Windows Server 2019 which will be under Equipment – Chassis – Servers
Once you select the server – in the General Tab – Select KVM Console (this opens in a new tab browser)
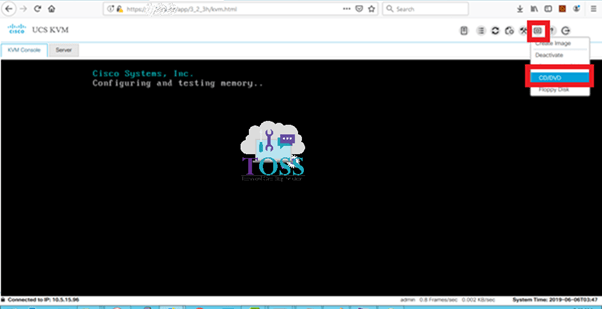
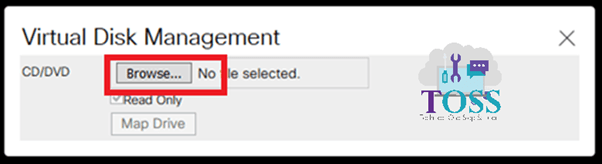
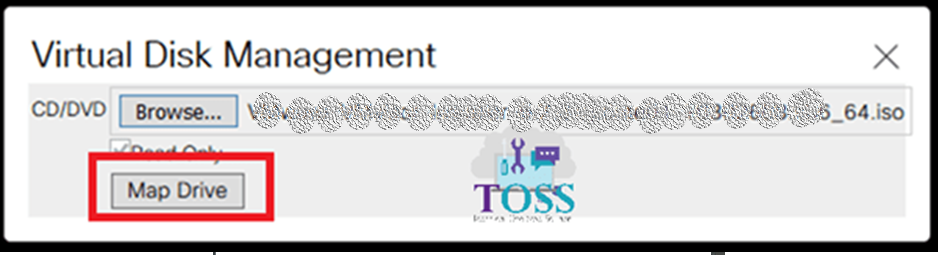
Now Attach the OS ISO Image to the Blade server. Select the Virtual Media – CD/DVD – Browse the ISO image and Map the Device
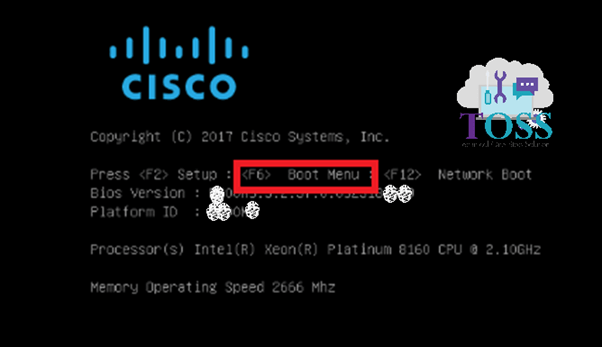
Once the ISO Image is attached – While the blade is booting – Enter to the Boot Menu by pressing F6
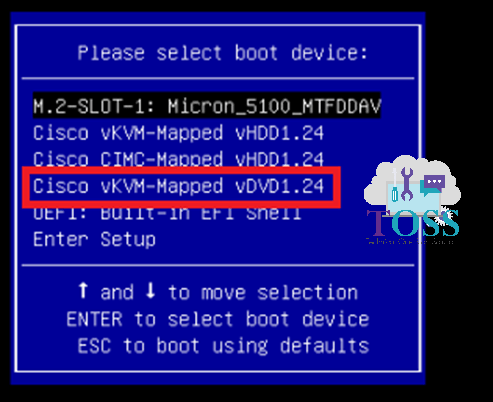
Select the boot device as DVD
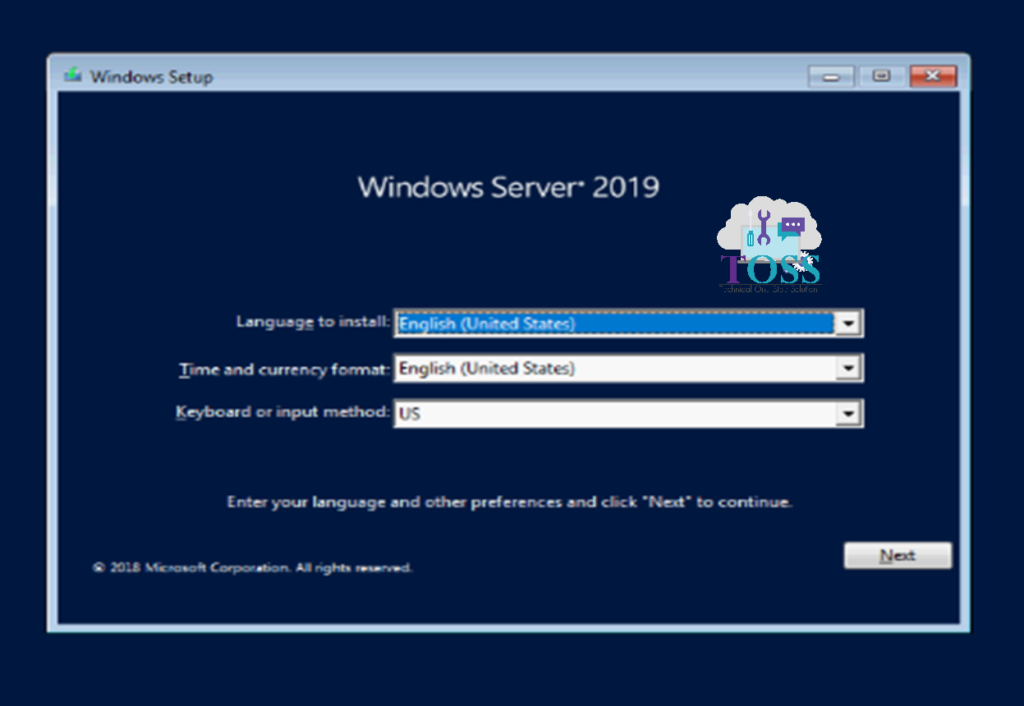
Once you press Enter, the OS files initializes to install

First Screen prompts for the Language, Time and Keyboard Layout Details – Select Default and Click Next
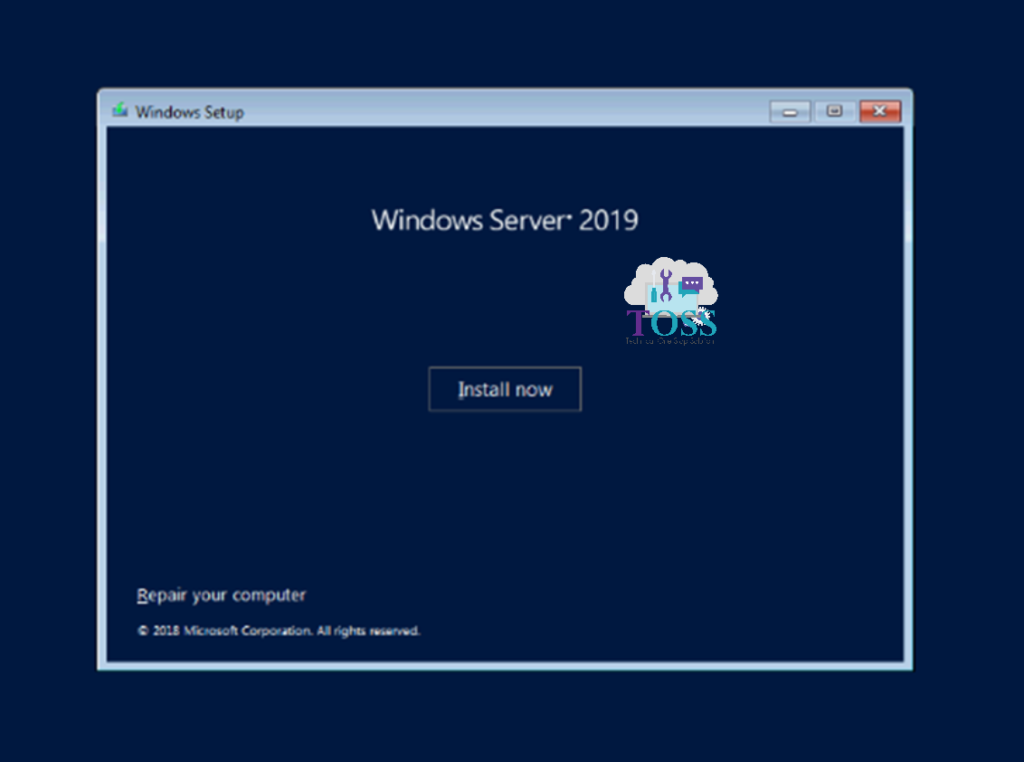
Select the Install Now
Setup Starts to proceed the Installation of Windows Server 2019

Enter the product Key of Windows Server 2019 or Select “I Don’t have a product Key and Click Next (we can add the license Product key details later as well)

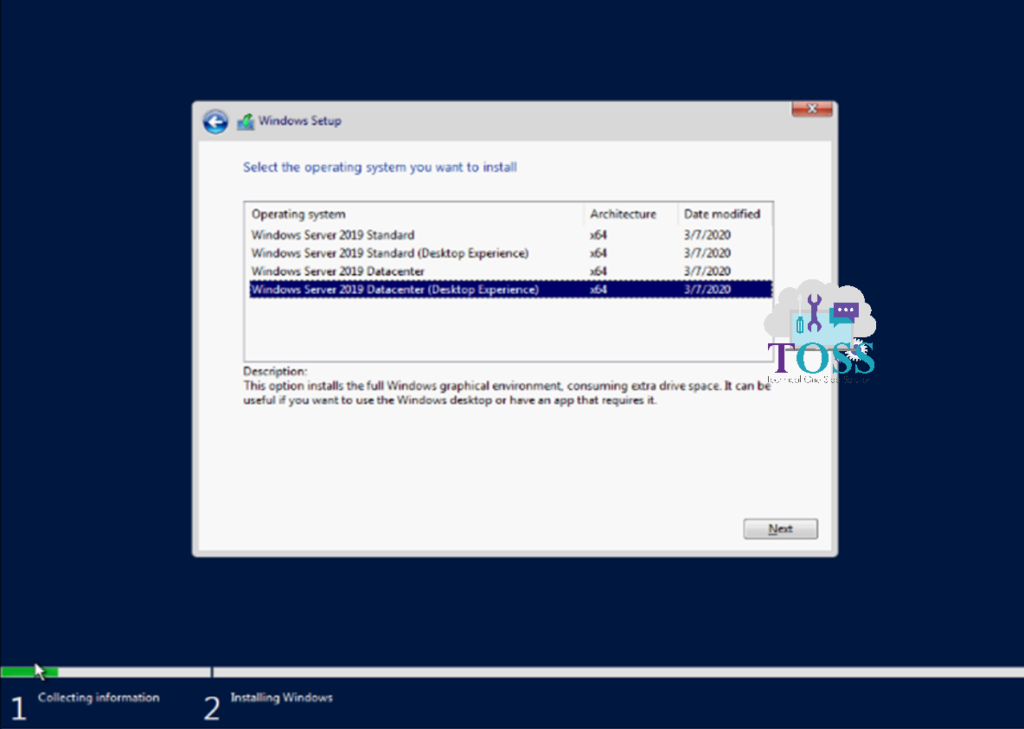
Select the OS Edition based on the requirement – We have selected “Windows Server 2019 with Desktop Experience (If we select the edition without Desktop Experience, it will install the Command Line)
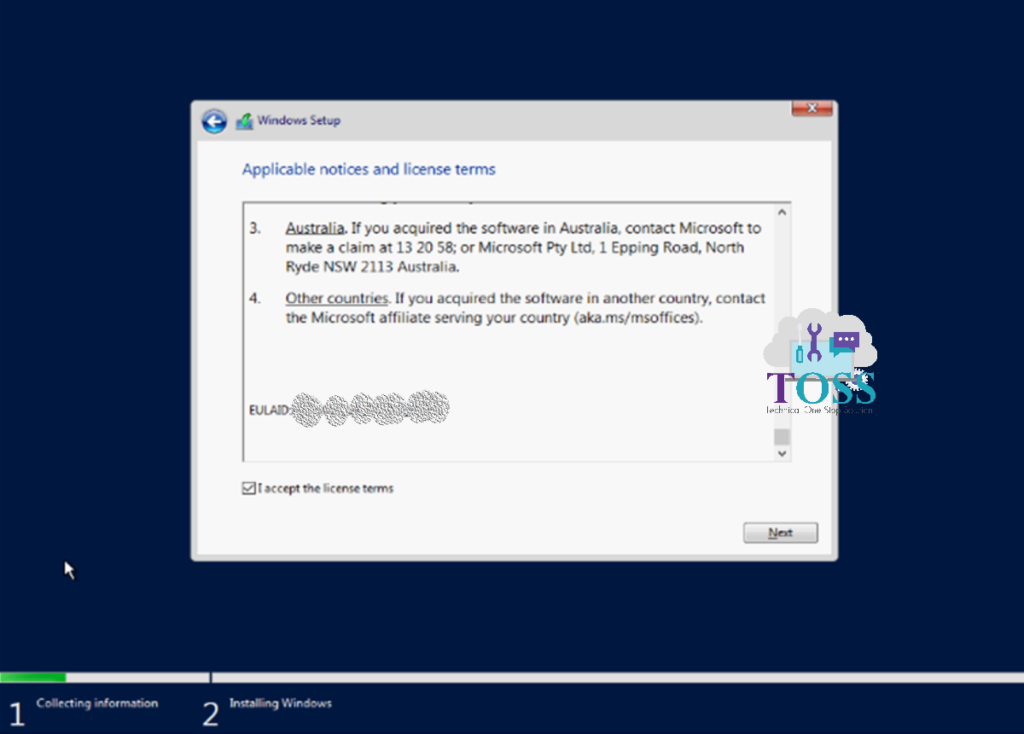
Accept the License Agreement to proceed further
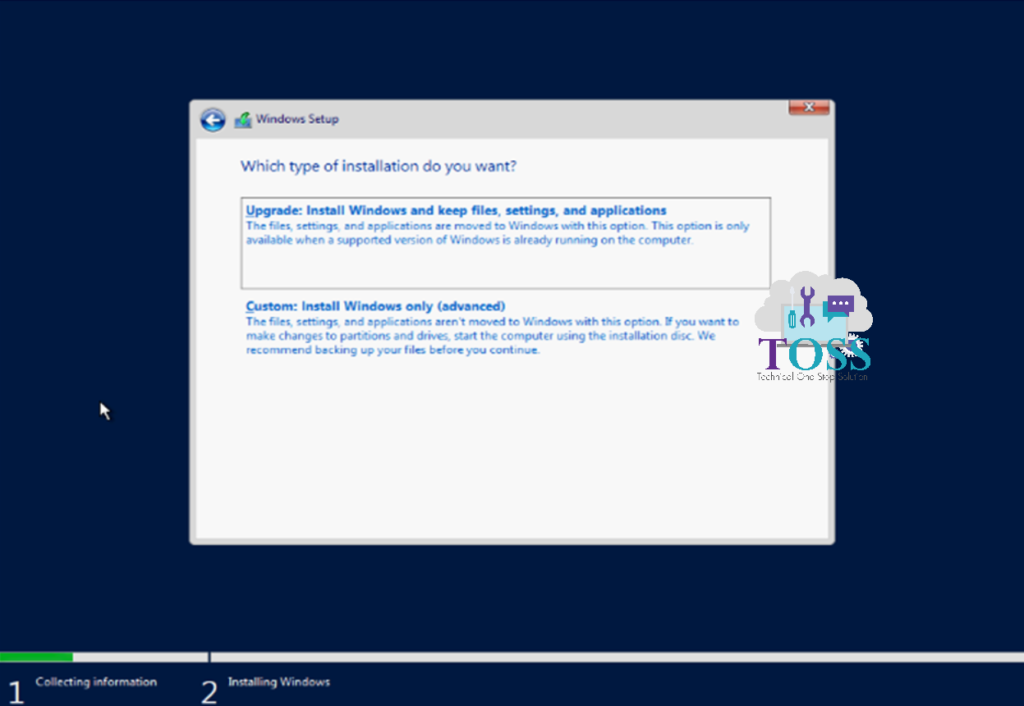
Select Upgrade Option – If upgrading the existing OS otherwise Select Custom Install – To install the fresh OS. We are doing the Fresh OS installation
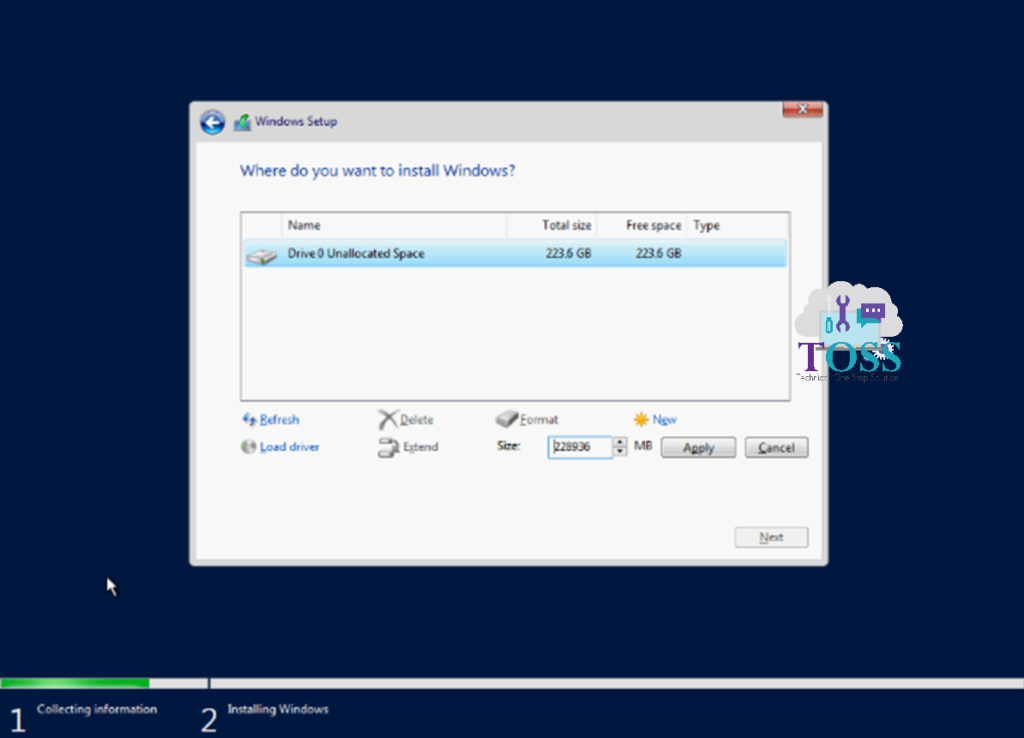
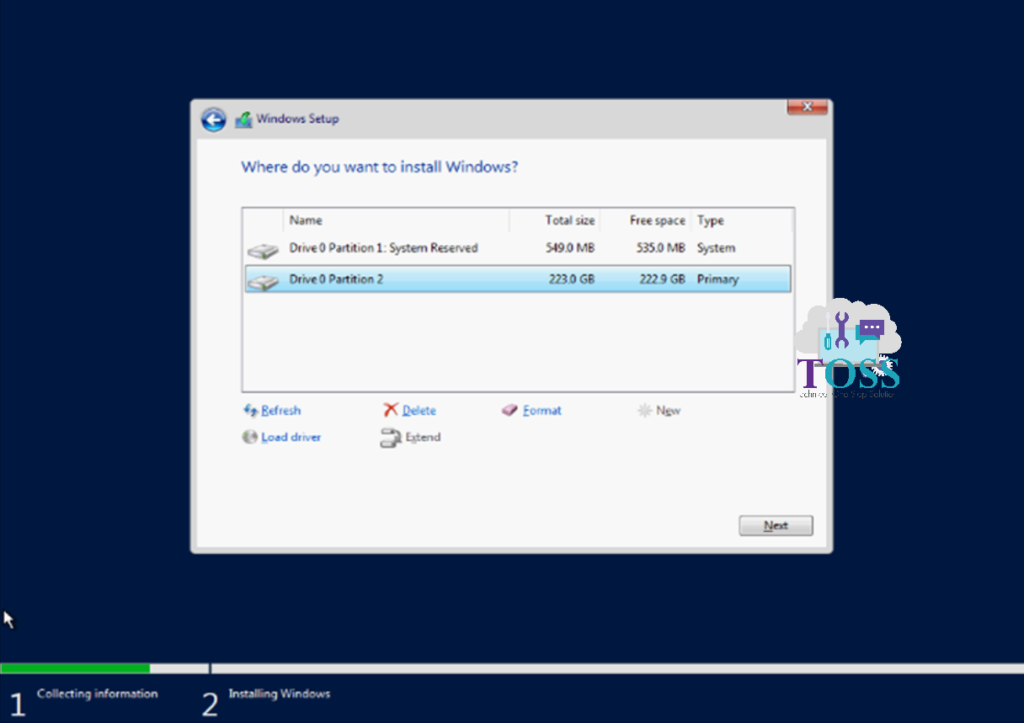
Select the Drive and Create partition/Format Partition to install the OS
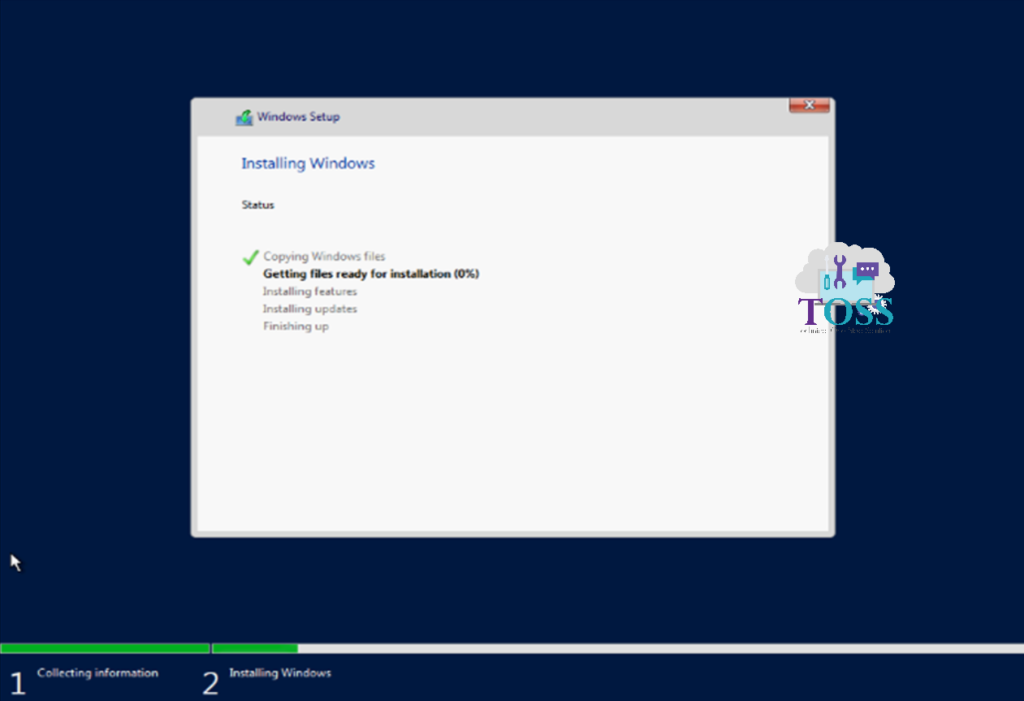
The OS installation starts to install and copy OS files to the selected partition.
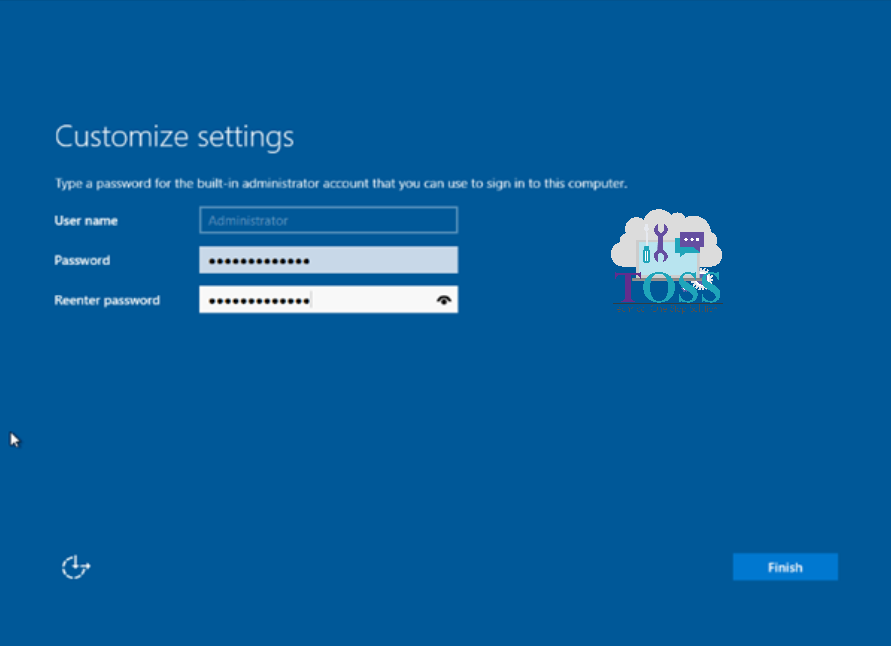
Once the Installation is completed, it prompts to set the new password for the administrator
Once you set the password you can login to the server. Next based on your requirements you can configure this Windows Server 2019.
We hope this blog has helped you in installing the Windows Server 2019 on CISCO UCS.
And also if you required any technology you want to learn, let us know below we will publish them in our site http://tossolution.com/
Like our page in Facebook and follow us for New technical information.