Adding certificate Chain to VMware NSX Edge And Attaching it to a SSLVPN
Adding certificate Chain to VMware NSX Edge And Attaching it to a SSLVPN
Certificates used for SSL always contain 2 main components:
A private key, which is never revealed and must be carefully protected, as its privacy is what ensure the security of the communication.
A public key is typically signed by a 3rd party, which ensure that the name on the key matches the key’s owner.
When a certificate is presented to the client with its intermediary certificate, you need to take these precautions to import the server certificate as a chained certificate.
If you import the certificate one by one as separate certificates, the server certificate is not chained, and the issuer identity will not be identified also it will be considered as vulnerability.
Note: We will receive a Server Certificate (.crt) with a private key (.key) from the CA
Extracting the Certificate Chain using the Server Certificate (.crt)
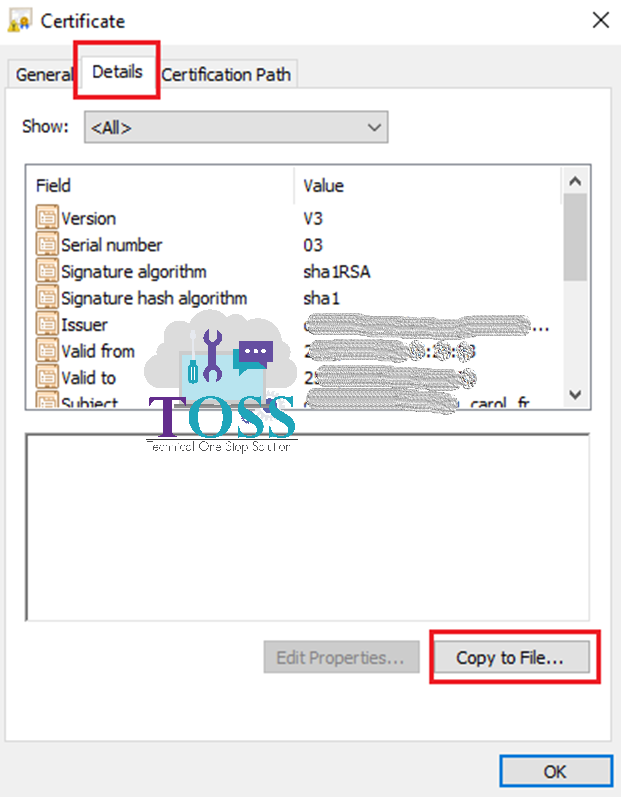
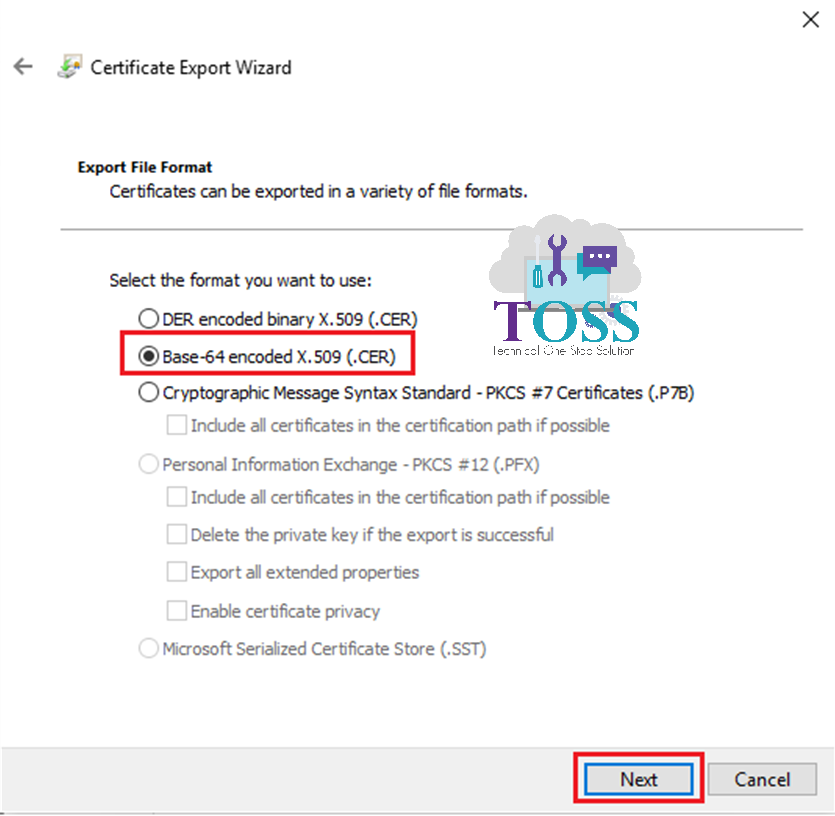
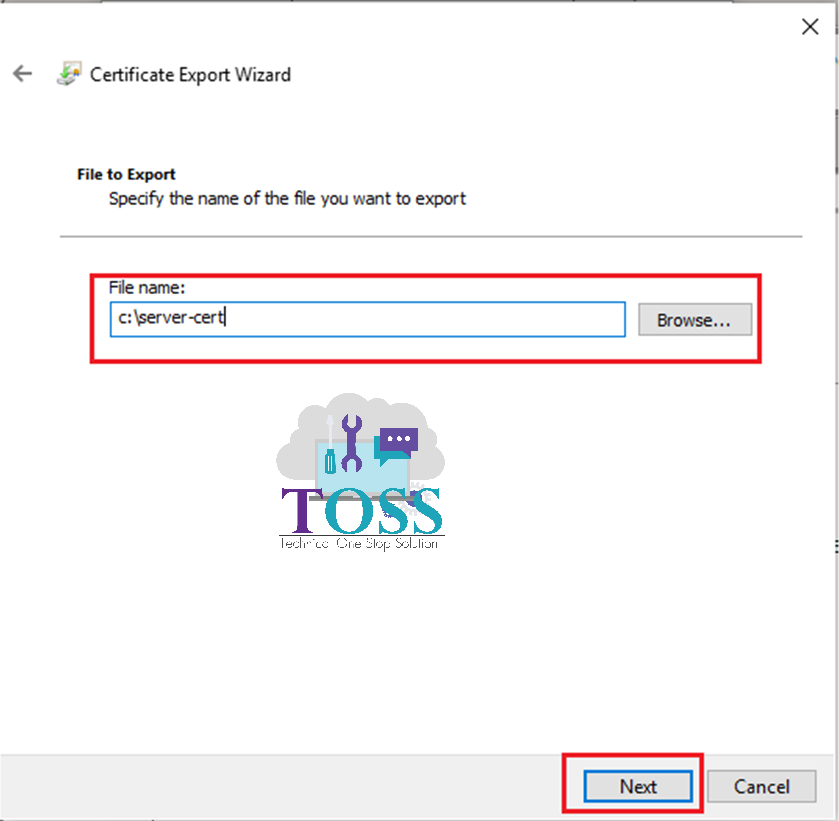
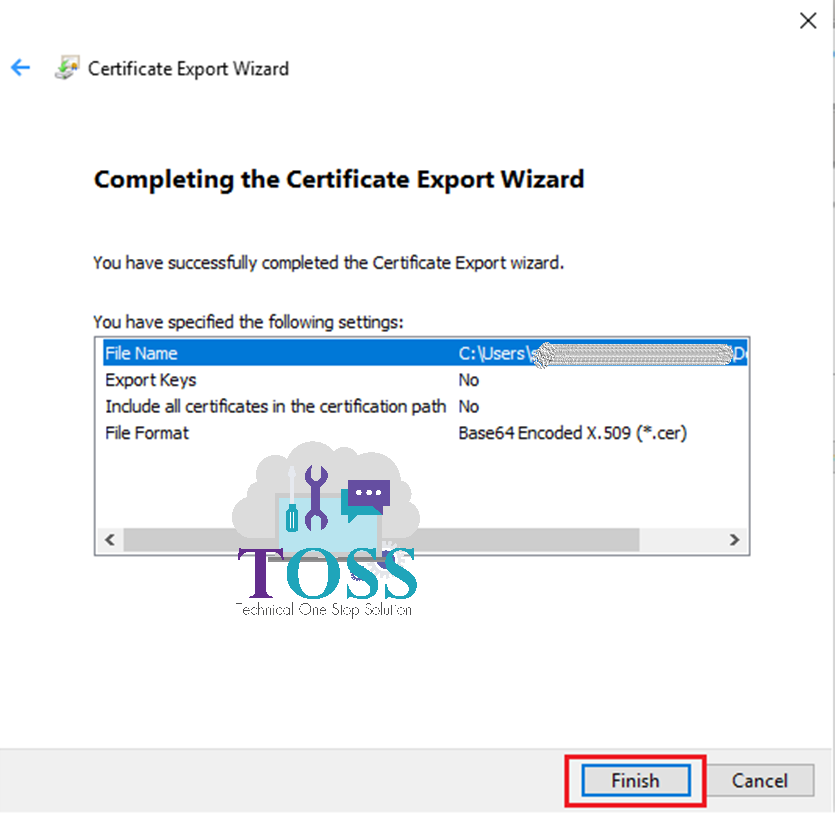
1. Open a Certificate – Select Details Tab – Copy to a File

2. Go to Certification Path Tab of the Server Certificate
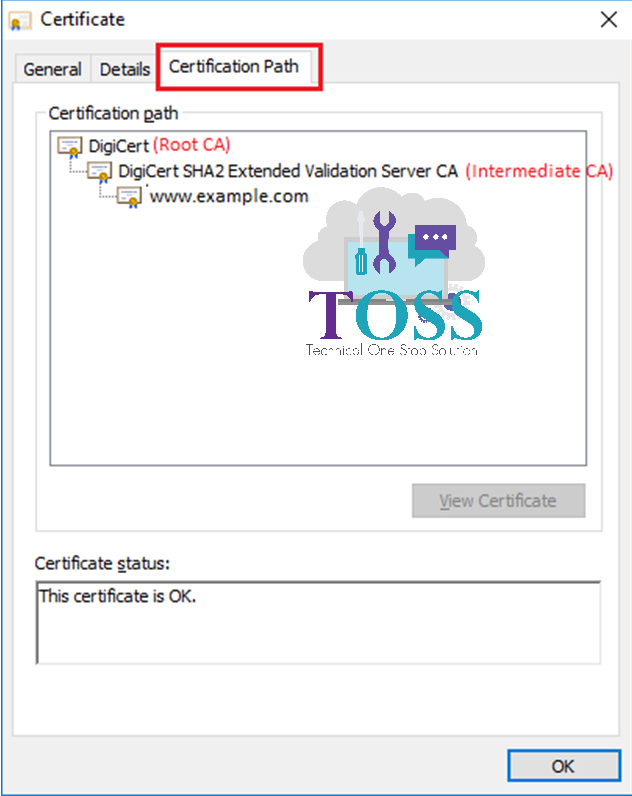
3. Select the Intermediate CA – Open (Double Click) – Details Tab – Copy to File (Follow the same Steps above mentioned to get the certificate chain)
4. Similarly perform the same action – By selecting Root CA – Open (Double Click) – Details Tab – Copy to File (Follow the same Steps above mentioned to get the certificate chain)
5. Now all the certificate copied file saved as server-cert, inter-cert, root-cert open in Notepad
Each certificate will have the —–BEGIN CERTIFICATE—– and —–END CERTIFICATE—– lines.
6. The Private Key provided with the server certificate will look like —–BEGIN RSA PRIVATE KEY—– and —–END RSA PRIVATE KEY—–
7. Keep this certificate chain ready to import to the NSX Edge(Open it in a Notepad)
Now Steps to import the server certificate that is chained with the intermediary certificate on the NSX Edge
1. Login to the vSphere Web Client
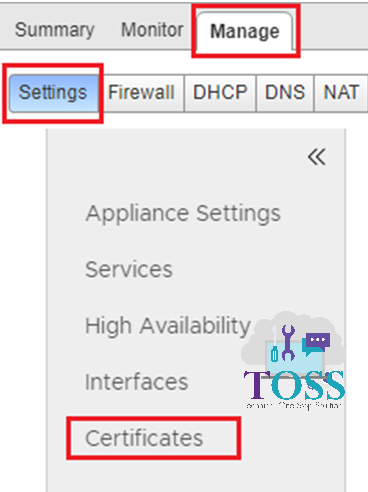
2. Navigate to Networking and Security – NSX Edges – Select the Edge to import the certificate
3. Go to Manage Tab – Settings – Certificate
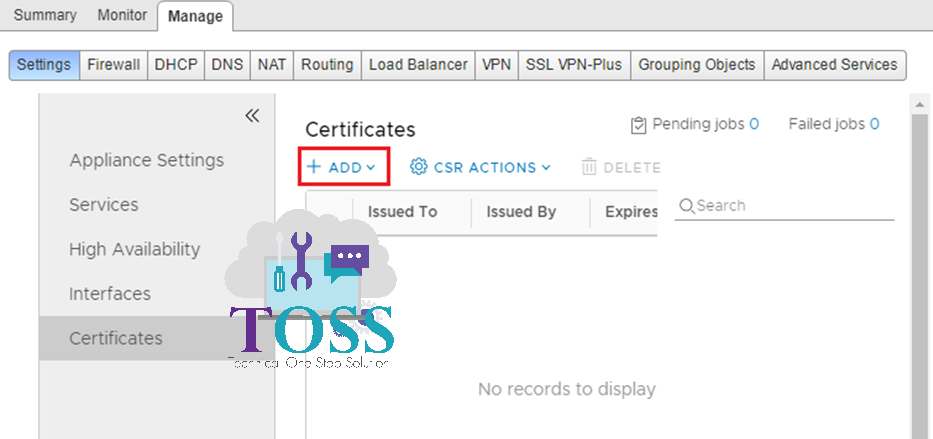
4. Click ADD – Certificate
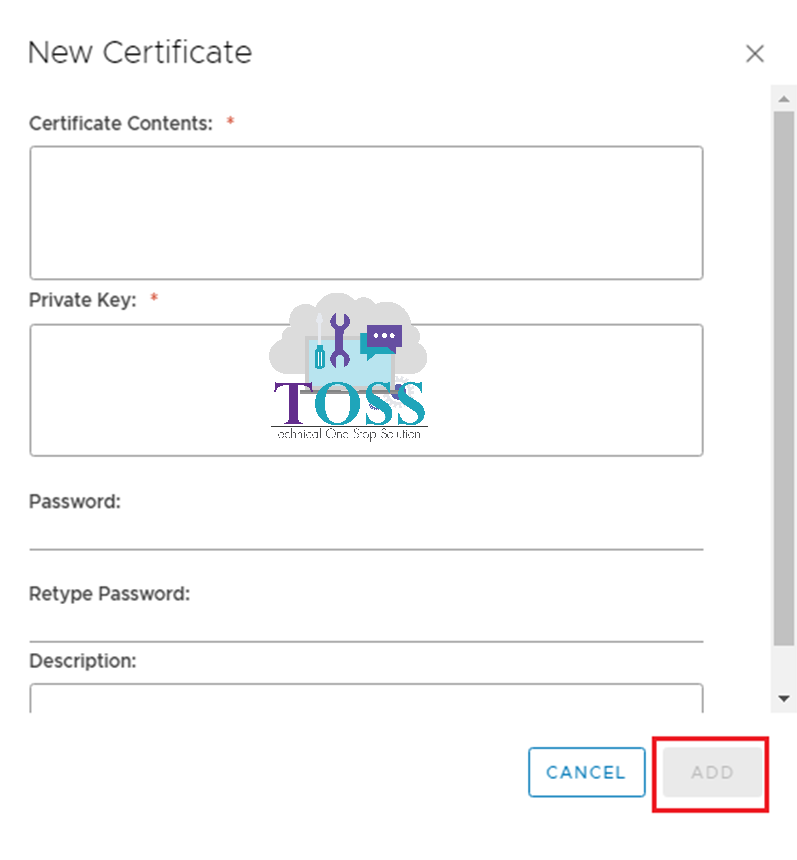
5. Paste the contents of the notepad to the Certificate Content and Private Key box. Also, provide the password if the private key is enabled password.
It should be in the following order in the Certificate Content Box
—–BEGIN CERTIFICATE—–
Server Certificate
—–END CERTIFICATE—–
—–BEGIN CERTIFICATE—–
Intermediate Certificate
—–END CERTIFICATE—–
—–BEGIN CERTIFICATE—–
Root Certificate
—–END CERTIFICATE—–
6. Once added we can see the certificate chain is added in the Certificate Tab
Attach a certificate to the SSLVPN for the Secured Access.
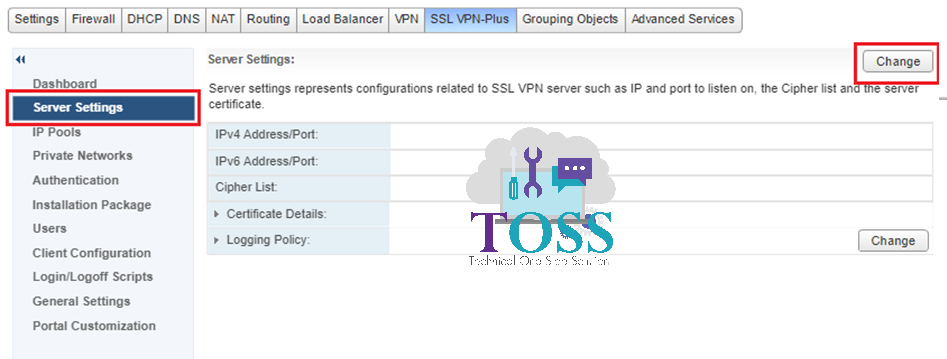
1. In the same NSX edge – Select SSLVPN

2. Select the server settings – Click Change
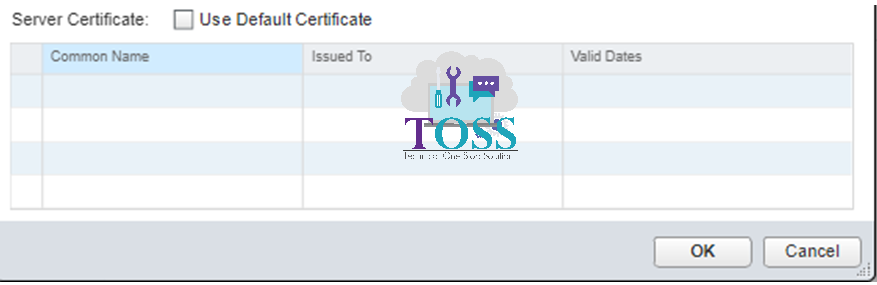
3. Use Default Certificate will be enabled by default – Uncheck and the select the certificate which will be displayed after you have added the certificate in the NSX edge and Click ok.
4. Now if the SSLVPN URL is Secured access and it will be enabled with certificate.
Adding certificate Chain to VMware NSX Edge And Attaching it to a SSLVPN Blog have the step by step detail, we hope you like this. If you required any details you can comment below.