VMware SSLVPN Configuration
In this Blog we will going to do VMware SSLVPN Configuration
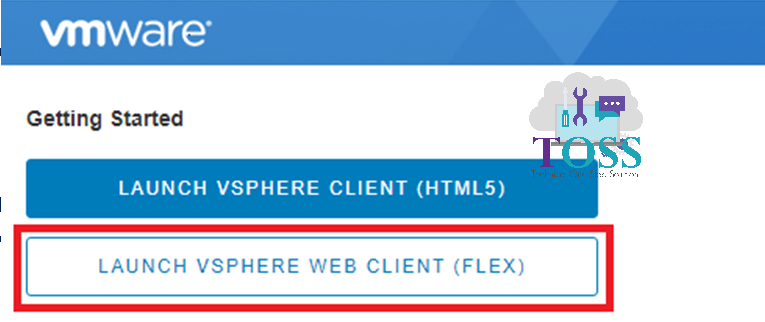
Login to the vCenter Server vSphere Web Client
Note: In VMware version 6.7 , Web client access is available in HTML5 and Flex. Use Flex option login to get the SSLVPN tab to be visible in the NSX edges. In HTML5 , SSLVPN tab will not be visible.
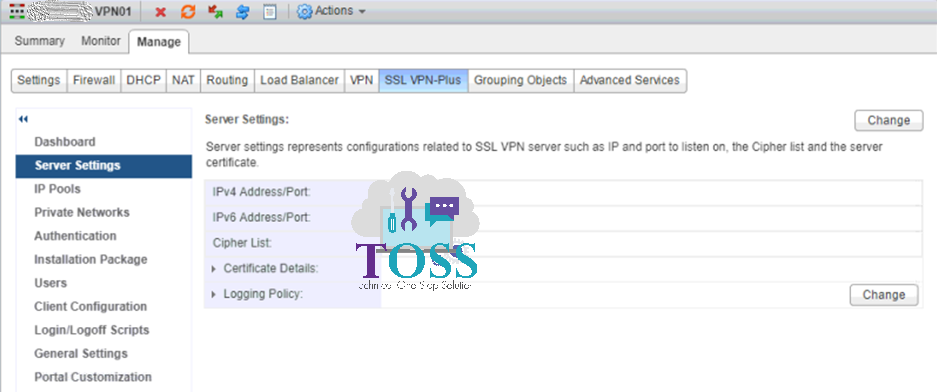
Home – Navigate Networking & Security > NSX Edges > Double click the NSX edge > Manage > SSL VPN-Plus > Server Settings. Click Change
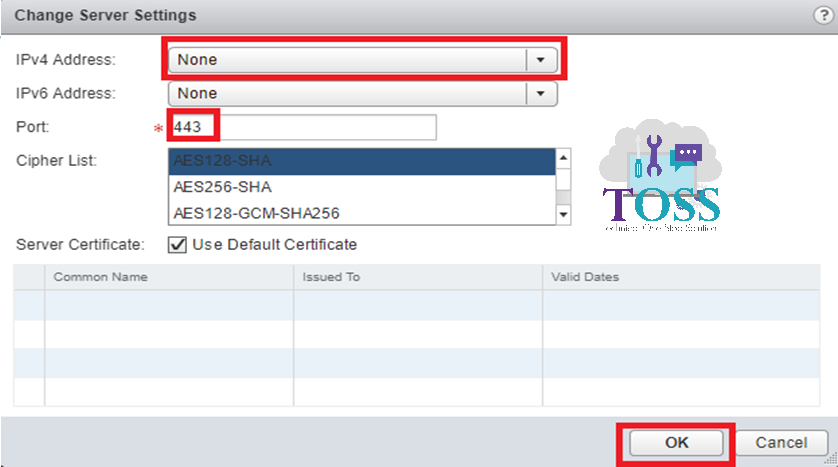
Provide the IP address(Edge Uplink Interface IP will be used as SSLVPN IP), Port number and select certificate(Optional) , Otherwise check Use Default Certificate and click OK
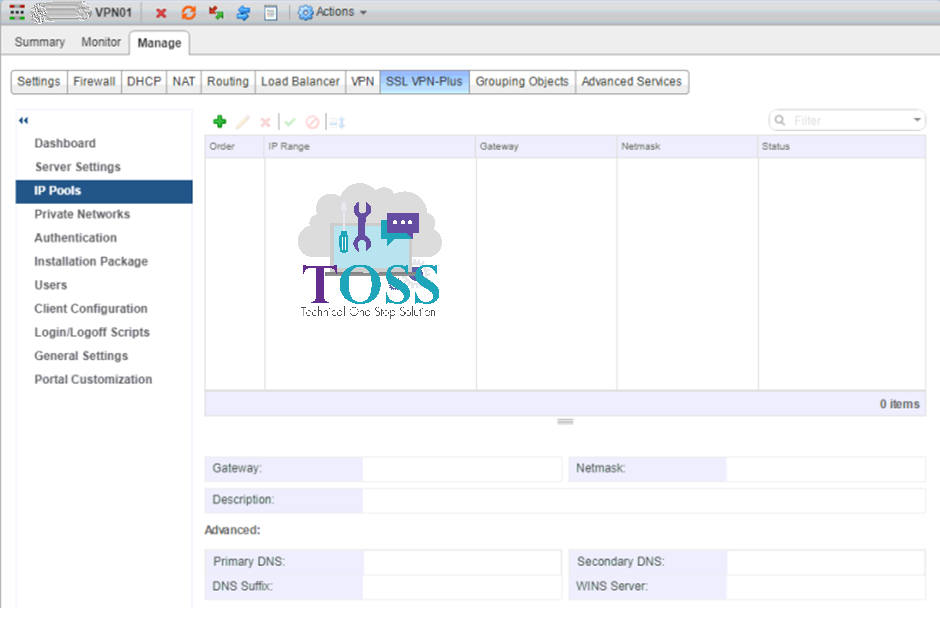
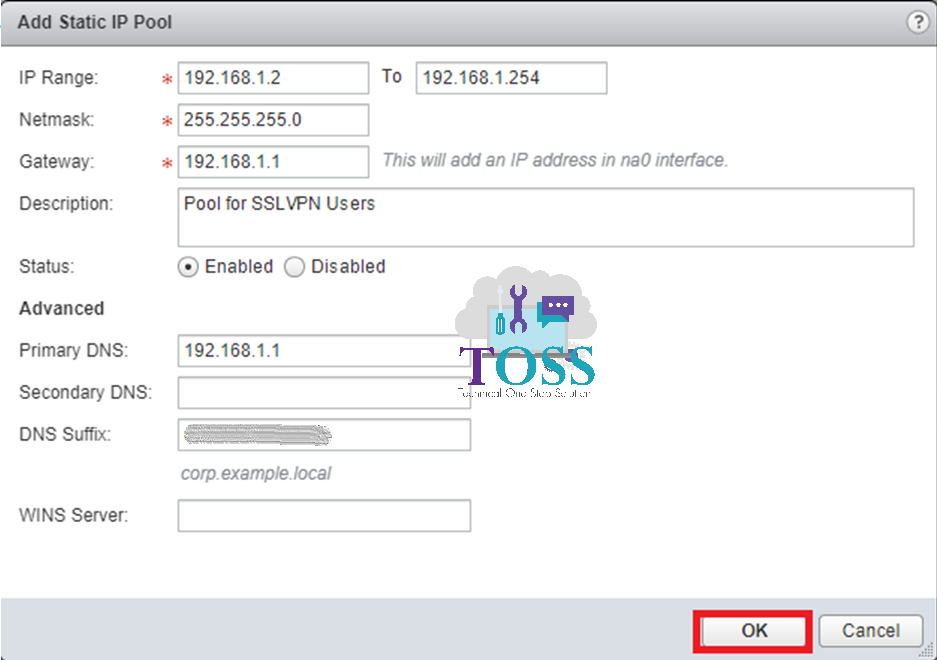
Add an IP Pool. An IP Pool is a range of virtual IP addresses that will be assigned to remote users when they are connected to the VPN.
Select the Add +
Enter the Network range(Start and End), Gateway address, DNS Address, DNS Suffix and Click OK.
Note : This IP Pool range routing information should be added to the physical network devices to successfully enable the communication between remote user and organization over VPN.
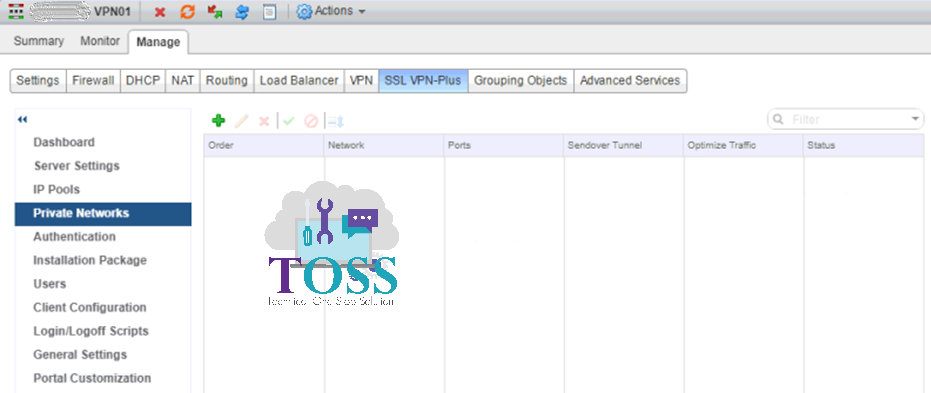
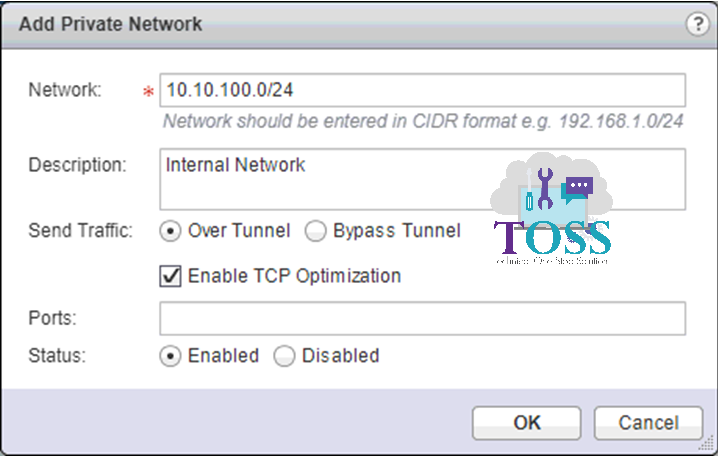
Add the private network range of the Organisation that should be accessible to the remote users when connected to the VPN.
Private Networks click on Add +
Type the private network IP address.
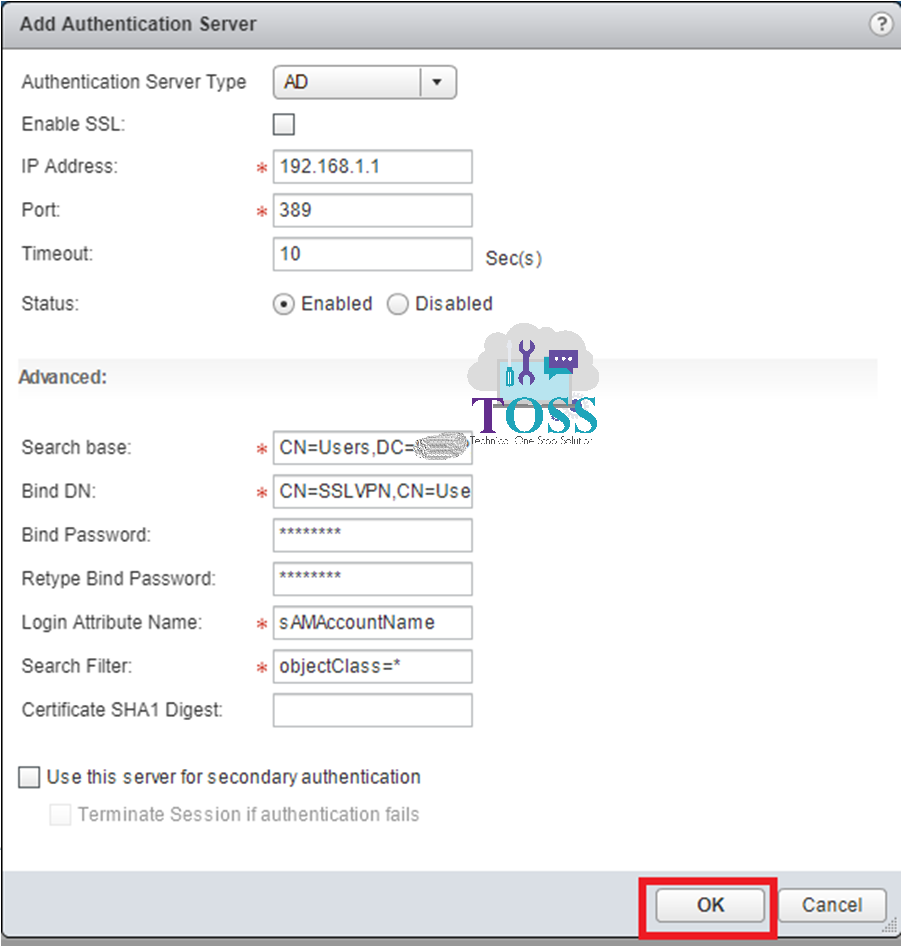
Authentication enables authorised remote users to login to SSLVPN using the credentials. SSL VPN supports local, AD, LDAP, Radius, or RSA authentication types.
Note: we must create an AD user in the Active Directory Users & Computers, before configuring the options. User can be only with Domain Users group membership.
Authentication Click on Add +
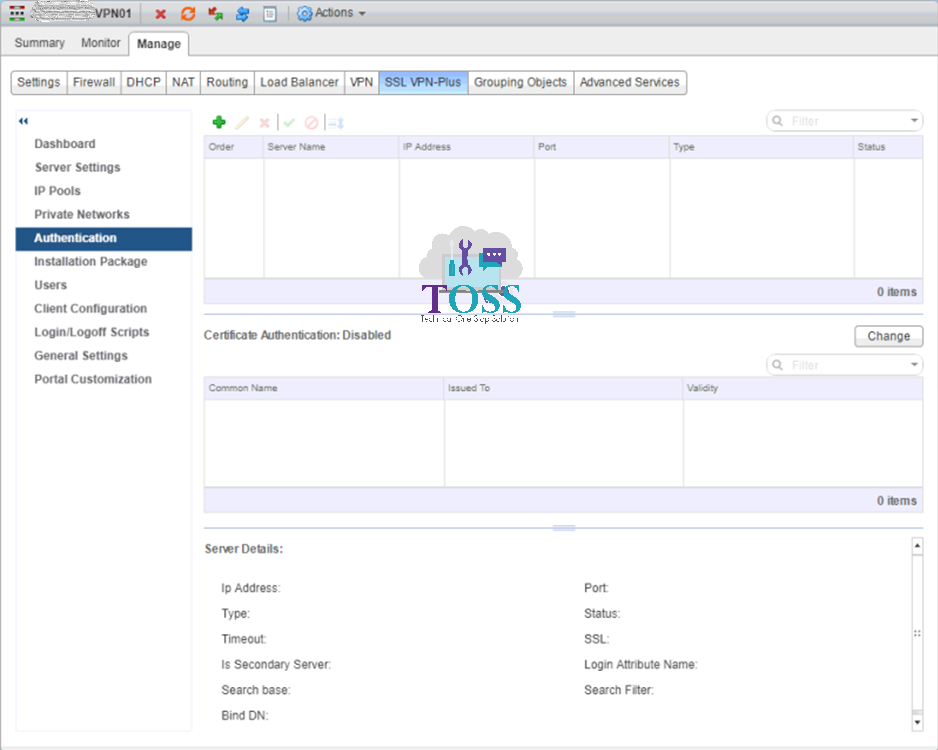
Configure the parameters and Click OK.
Note: Search Base is the path where all the users created and needs to be authenticated during SSLVPN login and Bind DN is the path of the service account user created to have a access to the AD to authenticate.
Example –
Search Base – OU=SSLUsers, DC=CORP,DC=COM – This indicates ALL users in the SSLUsers OU can be authenticated for the remote access
Bind DN – CN=SSLVPN,OU=SSLUsers,DC=CORP,DC=COM – SSLVPN is the service account created in the OU to access the AD server and authenticate the incoming remote access.
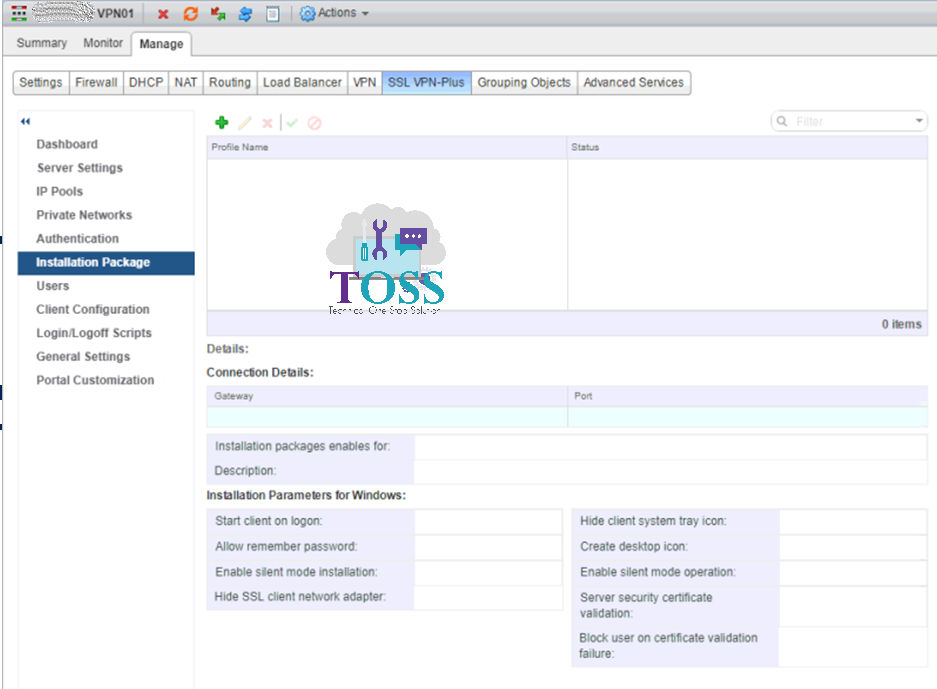
Installation package section enables remote users to download the SSLVPN client software and connect.
Note: Edge up-link interface to be mapped to the public IP address which will be used as an SSL VPN IP address for remote user.
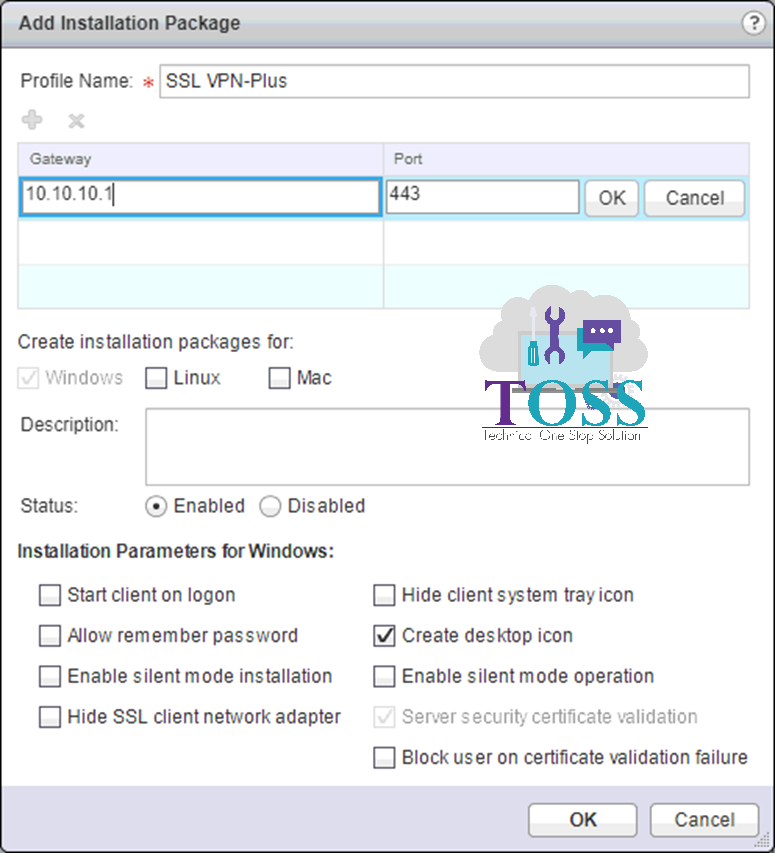
Under Installation Package click on Add +
Provide the Profile name -Gateway, enter the IP or FQDN of the public IP address of the NSX Edge – Enter the port number and Click OK.
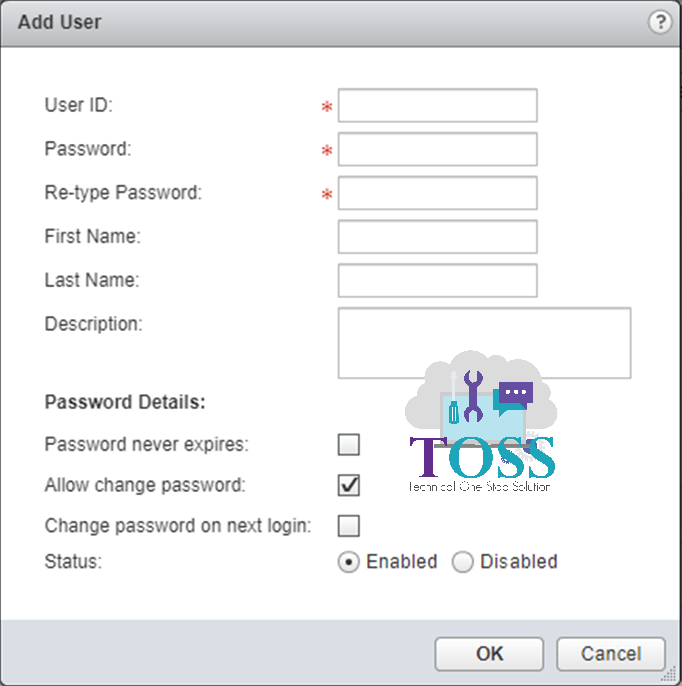
Users – The user accounts can be created if in case, Local Authentication is selected in the Authentication Section.
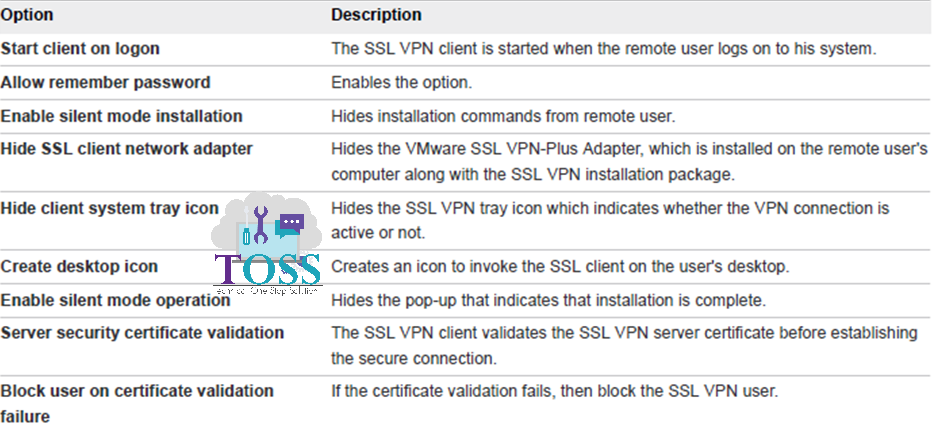
Other Sections can be left with default options configured.
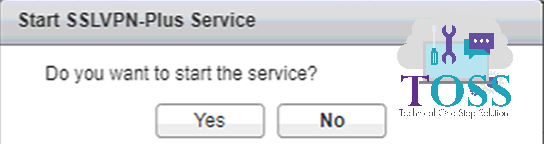
Finally enable the SSLVPN Service.

And click Yes to start the service
Testing the SSLVPN
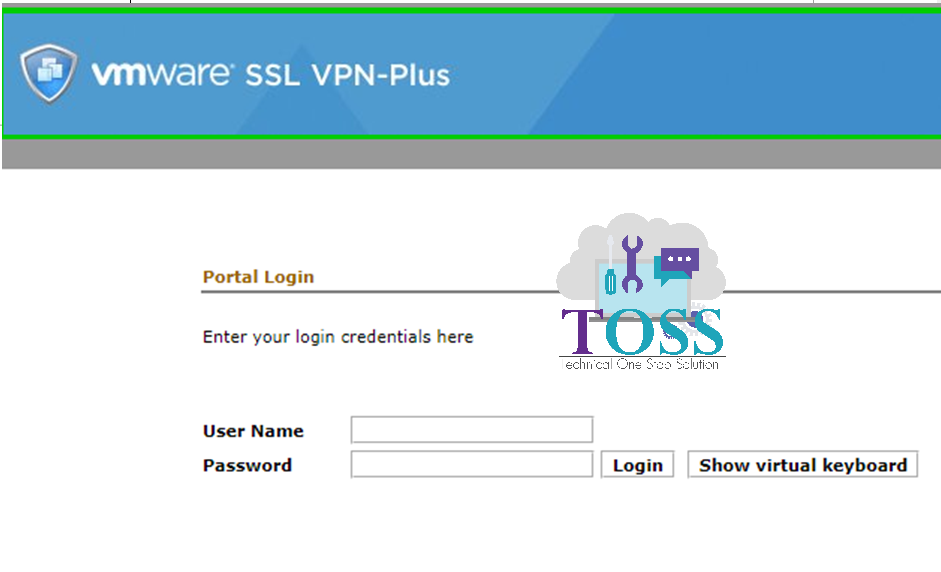
Login to the Public IP to download the SSLVPN Package Provide the AD User name& password and Click Login.
Click the VPN profile name to download the VPN client

Click the hyperlink (Click Here) to download the SSLVPN Profile.

The Downloaded Package will be in .zip – extract the packages and Click Installer.exe
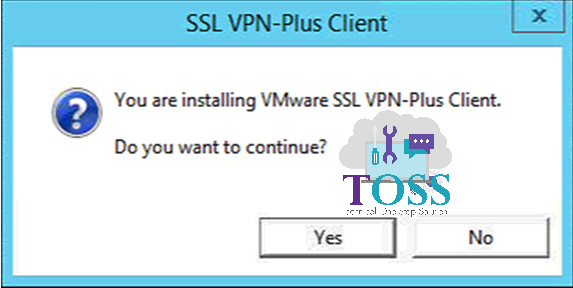
Click Yes to continue
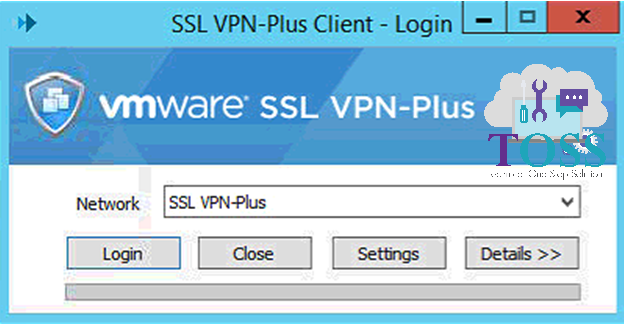
Once installed, an shortcut will be created – Click on the shortcut – Profile Name will be displayed and Click Login with AD credentials
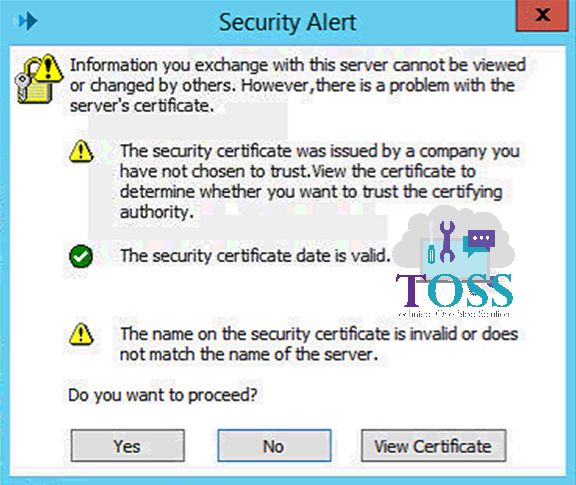
Accept the security alert
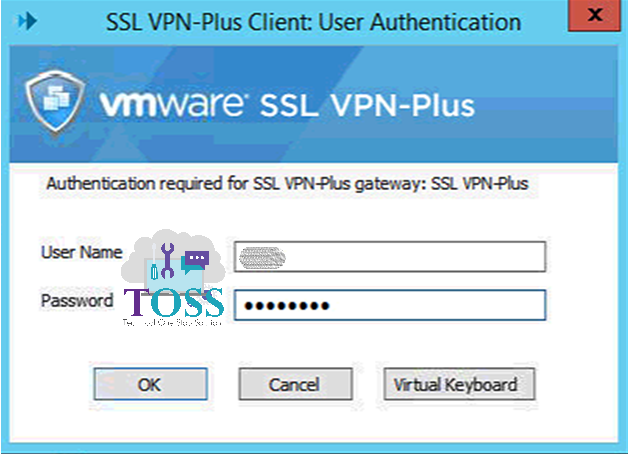
Enter in the credentials and Click OK.
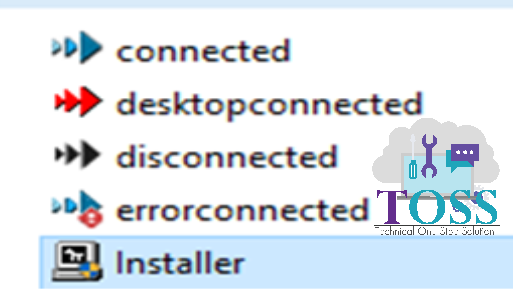
Now the SSLVPN connection has been connected. You can also check the system tray to see the VPN icon with the status as connected.

VMware SSLVPN Configuration Blog have the step by step detail, we hope you like this. If you required any details you can comment below.
Have you ever seen issues with accounts with expired passwords not being able to reset the password through the client. Using AD Authentication Service.
Thanks.
VMware SSLVPN client does not support AD Password Reset. Users should contact administrators for passwords reset or we should setup the Password Reset Portal